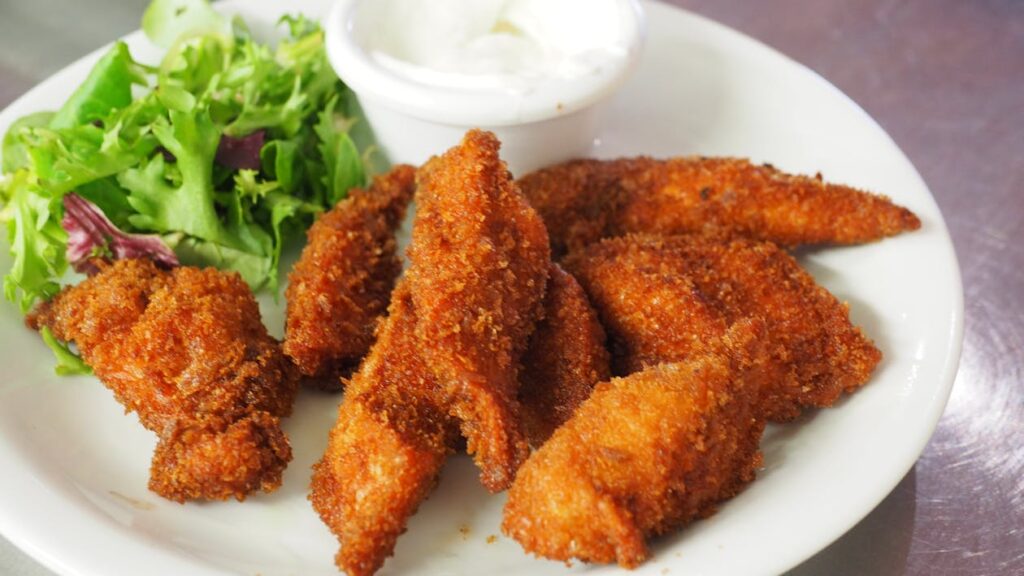
Introduction: Why Crispy Chicken Broast?
Chicken broast, with its irresistibly crispy coating and juicy interior, has won the hearts of food lovers worldwide. It’s the perfect comfort food—a delicious blend of flavors and textures that can be enjoyed with sides like coleslaw, fries, and various dipping sauces. But achieving that perfect fry requires more than just throwing chicken into hot oil; it’s about mastering the right techniques and understanding the science behind frying. In this guide, we’ll walk you through each step to help you achieve the perfect, crispy chicken broast every time.

The Essentials: Key Ingredients for Crispy Chicken Broast
To make crispy chicken broast, the ingredients must be carefully chosen. Here’s what you’ll need:
- Chicken: Bone-in pieces (thighs, drumsticks, and wings) for extra flavor and tenderness.
- Marinade: Buttermilk, garlic powder, paprika, salt, and pepper.
- Seasoned Flour Coating: All-purpose flour, cornstarch, baking powder, salt, black pepper, garlic powder, onion powder, and paprika.
- Oil: High-smoke-point oil like vegetable or peanut oil for frying.
The combination of these ingredients, paired with proper techniques, will make your chicken broast the ultimate crispy delight.
Step 1: Preparing the Marinade
Marinating the chicken is essential for juicy, flavorful results. Buttermilk is often used because it tenderizes the chicken and infuses it with flavor. Follow these steps for the perfect marinade:
- Mix the Marinade: In a large bowl, combine buttermilk, garlic powder, paprika, salt, and black pepper.
- Coat the Chicken: Add the chicken pieces, ensuring each is thoroughly coated with the marinade.
- Chill and Marinate: Cover the bowl and refrigerate for at least 2-4 hours (or overnight for even better results). This step is crucial as the buttermilk tenderizes the chicken, giving it a moist, flavorful interior.
Step 2: Preparing the Seasoned Flour Coating
The coating is where the magic happens. For the crispiest chicken, we need a well-seasoned flour mixture with just the right balance of spices and texture enhancers.
- Mix the Coating: In another bowl, combine all-purpose flour, cornstarch, baking powder, salt, black pepper, garlic powder, onion powder, and paprika.
- Get the Coating Ready: Once mixed, set it aside for easy dredging after marinating. Cornstarch is the secret ingredient here—it adds extra crunch to the chicken by making the coating crispier.
Step 3: Dredging the Chicken
For a crispy and even coating, follow these tips:
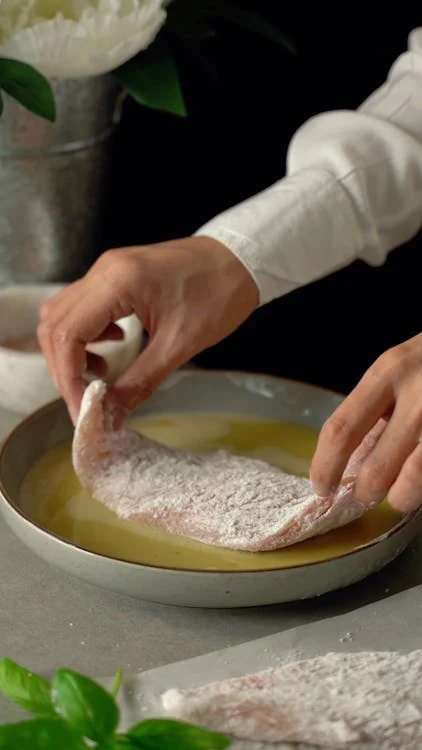
- Remove Chicken from Marinade: Allow excess marinade to drip off, but don’t pat it completely dry. The wet surface helps the flour mixture stick.
- Dredge in Flour Mixture: Place each piece in the seasoned flour and coat thoroughly, pressing the flour onto the chicken to ensure it sticks well.
- Rest the Coated Chicken: Place the dredged chicken on a rack or tray and let it sit for 10-15 minutes. This resting period allows the coating to adhere to the chicken, helping it fry up nice and crispy.
Step 4: Mastering the Fry
The frying process is where your broast transforms from good to great. Here are some key pointers:
- Heat the Oil: Pour oil into a deep skillet or Dutch oven until it’s about 1-2 inches deep. Heat it to 350°F (175°C).
- Fry in Batches: Fry the chicken in small batches to avoid overcrowding, which can lower the oil temperature and make the chicken greasy.
- Monitor the Temperature: Try to keep the oil temperature between 325°F and 350°F. Adjust the heat as needed to keep it steady.
- Fry Until Golden Brown: Fry each piece for 10-12 minutes, turning occasionally to ensure even cooking. Chicken is done when it reaches an internal temperature of 165°F and the coating is a deep golden brown.
- Drain Excess Oil: Once done, transfer the chicken to a wire rack to drain, which keeps it crispy by letting excess oil drip away.
Tips for the Perfect Crispy Texture
Achieving crispy chicken broast isn’t only about following a recipe it also involves using certain techniques and tricks to get that mouthwatering crunch.
- Add Cornstarch: Adding cornstarch to the flour coating makes the outer layer extra crispy and light.
- Use Baking Powder: Baking powder in the flour mixture creates air pockets in the crust, making it more textured and crunchy.
- Let the Coating Rest: Allow the coated chicken to sit before frying, ensuring the flour sticks better and provides a more uniform coating.
- Fry in Peanut or Canola Oil: These oils have high smoke points and neutral flavors, ideal for deep frying.
- Maintain Oil Temperature: Consistent oil temperature is key for an evenly cooked, crispy crust.

Serving Suggestions
To truly enjoy chicken broast, pair it with complementary sides and sauces:
- Coleslaw: A creamy, tangy coleslaw balances the richness of the fried chicken.
- Fries or Wedges: Golden, crispy fries make for a classic pairing.
- Garlic Sauce or BBQ Sauce: A flavorful dipping sauce adds an extra layer of deliciousness.
- Pickles: A few pickles on the side provide a refreshing, tangy contrast to the savory chicken.
Wrapping It Up: Why You’ll Love This Crispy Chicken Broast Recipe
This crispy chicken broast recipe is designed to bring out the best in every bite, offering a juicy, flavorful interior wrapped in a perfectly seasoned, crispy coating. Whether you’re cooking for a family dinner or a special gathering, mastering this recipe means you’ll always have a go-to dish that’s sure to impress.
Remember, the secrets lie in the marinade, the seasoned coating, and controlling the frying temperature. By following these steps and tips, you’ll be well on your way to mastering the art of chicken broast—one crispy bite at a time.

Pingback: White Qorma Recipe: Creamy Delight for Family Dinners - Hazir
Pingback: Paya Masala Recipe: The Art of Slow Cooking with Hazir Spices - Hazir